Photeeq Lens Flare has become a powerful tool for photographers looking to add cinematic lighting and artistic depth to their images. Whether you are a beginner experimenting with light or a professional refining your visual storytelling, lens flare can dramatically transform a photo’s mood and realism.
In modern digital photography, tools like Photeeq make it easier than ever to simulate or enhance natural light effects. Instead of relying solely on perfect shooting conditions, photographers can now craft stunning visuals in post-processing. This guide will walk you through everything you need to know about Photeeq Lens Flare, from basics to advanced techniques.
What is Photeeq Lens Flare?
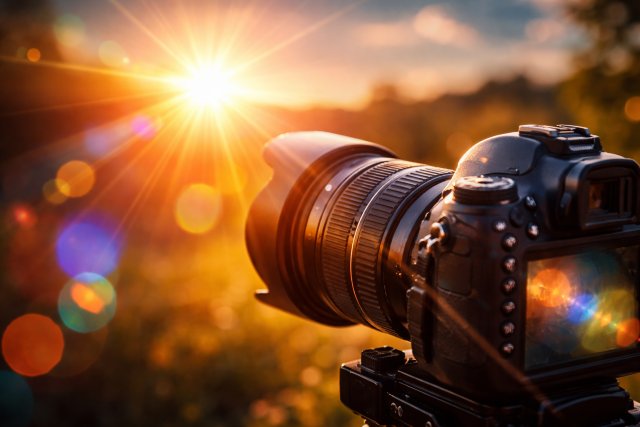
Photeeq Lens Flare refers to a digital effect that mimics the scattering of light inside a camera lens when a bright light source, such as the sun, hits it directly. Traditionally, lens flare was considered a flaw in photography. Today, it is widely used as a creative element.
With Photeeq, photographers can:
Add realistic light streaks and glow
Enhance natural sunlight in images
Create cinematic or dreamy effects
Control intensity, angle, and color of flares
Unlike random natural flares, Photeeq gives you full creative control, making it ideal for both artistic and commercial photography.
Why Lens Flare Matters in Photography
Lens flare is no longer just an accident — it’s a storytelling tool. It can evoke emotion, highlight subjects, and create depth.
According to research published by Adobe and photography studies, images with dynamic lighting effects tend to receive higher engagement, especially on visual platforms like Instagram and Pinterest.
Key Benefits of Using Lens Flare
Adds realism to outdoor shots
Enhances mood and atmosphere
Creates depth and dimension
Draws attention to focal points
Photeeq Lens Flare makes achieving these effects faster and more precise compared to traditional methods.
How Photeeq Lens Flare Works
Photeeq integrates with photo editing workflows and allows you to overlay customizable light effects onto your images. It simulates how light interacts with lens elements.
Core Features
Adjustable light intensity
Multiple flare styles
Color temperature control
Positioning and scaling tools
These features help photographers replicate real-world lighting conditions without needing expensive equipment or perfect timing.
Types of Lens Flare Effects You Can Create
Different styles of lens flare produce different visual impacts. With Photeeq, you can experiment with various effects.
1. Sunburst Flare
A dramatic effect where light radiates outward, often used in landscape photography.
2. Cinematic Streaks
Popular in filmmaking, these horizontal streaks add a professional, movie-like feel.
3. Soft Glow
A subtle haze that creates a dreamy, romantic atmosphere.
4. Rainbow Flare
Colorful reflections that add vibrancy and artistic flair.
Each type serves a different purpose depending on your creative vision.
When to Use Photeeq Lens Flare
Timing and context are crucial when using lens flare. Overusing it can make images look artificial.
Best Situations
Golden hour photography
Portraits with backlighting
Landscape shots with sunlight
Urban photography with reflections
When to Avoid It
Product photography requiring clarity
Technical or documentary shots
Overly dark scenes
Using Photeeq Lens Flare strategically ensures your images remain professional and visually appealing.
Step-by-Step Guide to Using Photeeq Lens Flare
Even beginners can achieve stunning results with the right approach.
Step 1: Choose the Right Image
Select a photo with a visible light source or one that could realistically include one.
Step 2: Apply the Flare Effect
Use Photeeq to add a flare overlay. Position it near the light source.
Step 3: Adjust Intensity
Reduce opacity to maintain a natural look.
Step 4: Fine-Tune Colors
Match the flare color with the overall tone of your image.
Step 5: Blend Naturally
Use blending modes to integrate the effect seamlessly.
Pro Tips for Stunning Results
Creating professional-quality images requires more than just applying effects.
Keep It Subtle
Overly strong flares can distract from the subject. Aim for realism.
Match Light Direction
Ensure the flare aligns with the existing light source.
Use Layer Masking
Blend the flare behind objects for a more natural appearance.
Combine with Color Grading
Enhance the overall mood by adjusting tones alongside the flare.
Professional photographers often combine multiple techniques to achieve cinematic results.
Common Mistakes to Avoid
Even experienced photographers can misuse lens flare.
Overuse of Effects
Too many flares can make images look cluttered.
Ignoring Light Physics
Unrealistic placement reduces credibility.
Wrong Color Temperature
A mismatch can make the image feel unnatural.
Avoiding these mistakes ensures your work maintains a high standard.
Photeeq Lens Flare vs Natural Lens Flare
There is an ongoing debate between using natural versus digital lens flare.
Natural Lens Flare
Requires precise lighting conditions
Can be unpredictable
Offers authentic results
Photeeq Lens Flare
Fully controllable
Works in any lighting condition
Saves time and effort
Most modern photographers use a combination of both methods to achieve the best results.
Real-World Applications
Photeeq Lens Flare is widely used across different photography niches.
Portrait Photography
Adds warmth and emotion, especially in outdoor shoots.
Landscape Photography
Enhances sunsets and sunrise scenes.
Commercial Photography
Used in advertisements to create visually appealing imagery.
Social Media Content
Boosts engagement by making images stand out.
Brands and influencers often rely on such effects to create eye-catching visuals.
Case Study: Enhancing Engagement with Lens Flare
A study by HubSpot shows that visually enhanced images can increase engagement by up to 40%. Photographers who incorporate light effects like lens flare often see higher interaction rates on social media platforms.
For example, travel photographers using subtle lens flare in sunset shots report improved audience engagement and emotional connection.
Frequently Asked Questions (FAQ)
What is Photeeq Lens Flare?
Photeeq Lens Flare is a digital effect that simulates light scattering in photography, allowing users to add realistic or artistic light effects to images.
Is lens flare good or bad in photography?
It depends on usage. When applied correctly, it enhances mood and realism. Overuse can make images look artificial.
Can beginners use Photeeq Lens Flare?
Yes, it is beginner-friendly and offers intuitive controls for easy customization.
Does lens flare affect image quality?
If used excessively, it can reduce clarity. Subtle application maintains quality.
Future of Lens Flare in Digital Photography
With advancements in AI and editing tools, lens flare effects are becoming more realistic and customizable. Tools like Photeeq are expected to integrate smarter automation, allowing photographers to generate effects based on scene analysis.
According to Adobe’s future trends report, AI-driven editing will dominate photography workflows in the coming years.
Conclusion
Photeeq Lens Flare is a game-changer for photographers who want to elevate their images with stunning light effects. It bridges the gap between natural lighting and digital creativity, offering complete control over how light interacts within your composition.
By understanding when and how to use lens flare, you can create visually compelling images that stand out in today’s competitive digital landscape. Whether you are shooting portraits, landscapes, or commercial content, mastering Photeeq Lens Flare will significantly enhance your photography skills.


Leave a comment