If your cuts are getting rough, your edges are burning, or your “sharp” bit suddenly feels like it’s fighting the material, don’t assume it’s time to sharpen or replace it. In many shops, the first fix is cutter cleaner — a fast, low-cost routine that removes pitch, resin, glue, and gunk that quietly ruins cut quality. Pros treat cleaning like part of the setup, not an occasional chore, because a clean cutter runs cooler, cuts smoother, and stays consistent job after job.
Below is a practical, workshop-friendly guide to cutter cleaning that’s optimized for cleaner cuts, longer tool life, and fewer “mystery” machining problems.
What is a cutter cleaner?
A cutter cleaner is a purpose-made solution (or safe degreaser alternative) designed to dissolve and lift stubborn buildup on cutting tools — think router bits, CNC cutters, saw blades, and even some milling cutters. The most common “dirt” isn’t dust; it’s resin/pitch and adhesive residue that melts onto hot cutting edges and hardens into a thin coating.
That coating changes how the edge behaves. Instead of slicing cleanly, the cutter starts rubbing more, which increases heat and friction — two big drivers of burning, tear-out, and inconsistent finish.
Why dirty cutters stop making clean cuts
Even when carbide is technically still sharp, buildup can make it act dull.
Resin and pitch increase friction and heat
Wood resins can melt during cutting and re-solidify on the carbide, forming a layer that changes cutting geometry and increases rubbing. This is one reason “sudden burning” often shows up after running pine or other resinous woods.
Heat and friction are directly tied to surface quality
In machining and cutting processes, factors like tool condition, wear, built-up edge, and cutting forces influence surface finish and roughness. When a tool rubs more (instead of shearing), surface quality tends to suffer.
Dirty tools can create safety and control issues
A cutter that struggles is more likely to grab, chatter, or behave unpredictably. Several woodworking maintenance guides point out that buildup can lead to rough cutting and more risk-prone operation.
The “simple trick” pros use: clean before you change settings
Here’s what experienced operators do differently:
They clean the cutter before they touch speed, feed, depth of cut, fences, or jigs.
Why? Because buildup mimics other problems. You can waste an hour “tuning” a machine to compensate for a tool that’s simply dirty. Many CNC/woodworking maintenance routines explicitly recommend quick inspection and cleaning because it protects repeatability and reduces scrap.
Cutter cleaner routine for cleaner cuts (the pro workflow)
This is the basic workflow cabinet shops and CNC users lean on — fast enough to do frequently, thorough enough to matter.
Step 1: Remove the cutter and inspect it under good light
Look for:
Brown/amber glazing on the cutting edge or flute (pitch/resin)
Black marks (overheating)
Glue streaks (sheet goods, edgebanding, laminated stock)
Packed debris in gullets/flutes
If you have a small loupe or phone macro lens, use it. Small buildup is easy to miss until it becomes a cut-quality issue.
Step 2: Apply cutter cleaner and let it dwell briefly
Spray or soak (depending on product) and give it time to work. Most pitch/resin removers or degreasers need a short dwell period to soften buildup rather than forcing you to scrape aggressively.
Woodworking guides commonly recommend soaking or applying a dedicated cleaner/degreaser to loosen pitch and resin before brushing.
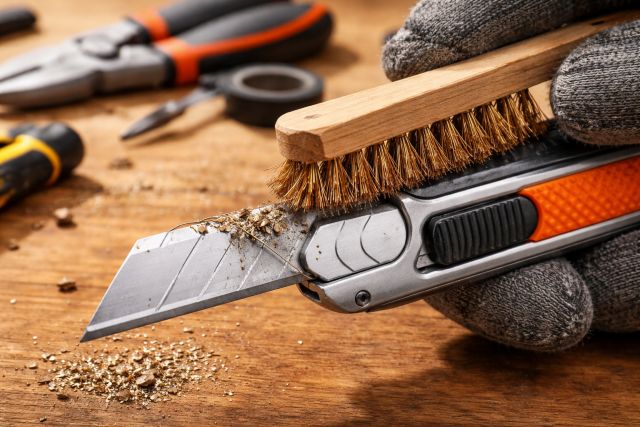
Step 3: Brush gently with the right brush
Use a brass brush or a nylon brush. Brass is stiff enough to remove softened residue without being as aggressive as steel. Avoid hard steel brushing on cutting edges—you’re not trying to “sharpen,” you’re trying to clean.
Step 4: Rinse, dry immediately, and prevent rust (for steel bodies)
If your cutter has a steel body (common with many bits and blades), dry it immediately. Some shops add a light rust inhibitor after cleaning, especially in humid environments.
Step 5: Reinstall clean — and don’t forget the holder/collet
A spotless cutter in a dirty collet is still a problem. Dust, resin, or fine debris in the collet can hurt grip and alignment. Pro maintenance routines include cleaning tooling and holders as part of the same habit.
Choosing the best cutter cleaner (what actually matters)
You’ll see everything from purpose-made pitch removers to general degreasers. Instead of arguing brands, focus on three practical factors:
1) It dissolves resin/pitch and glue effectively
Resin and adhesive are the main enemies for woodworking cutters. If it doesn’t soften that film, it won’t solve your cut-quality issue.
2) It’s compatible with your cutter materials
Carbide edges are tough, but cutters often combine carbide with steel bodies, brazing, coatings, and bearings. If you’re cleaning a bit with a bearing, make sure your process doesn’t flush grease out of the bearing or trap cleaner inside it.
3) It fits your shop’s safety reality
Some solvents are effective but demand more ventilation and fire safety. For example, acetone is highly flammable (very low flash point) and requires careful handling.
If your shop setup isn’t designed for volatile solvents, use a safer cutter-cleaner product designed for pitch/resin, or a milder degreaser that still works.
Common cutter cleaning mistakes (and how pros avoid them)
Scraping with hard metal tools
If you’re scraping with a knife or steel pick, you’re risking micro-chipping and edge damage. The goal is chemical softening + brushing, not gouging.
Cleaning the cutter but ignoring runout sources
If you clean the cutter and it still cuts rough, check the basics: collet cleanliness, proper clamping depth, and tool damage. The “dirty cutter” problem is common, but it’s not the only cause of poor finish.
Waiting until the cutter “looks terrible”
By the time buildup is obvious, cut quality has often been degraded for a while. Many pro routines recommend quick per-job checks because it takes seconds and prevents chasing problems later.
Real-world scenario: how cutter cleaner saves a job
Imagine a cabinet shop cutting melamine-faced board and then switching to pine trim on the same CNC.
The melamine/adhesive residue starts coating the flutes.
Then pine resin adds a sticky layer on top.
Cuts that were crisp in the morning now show edge fuzzing, minor chipping, and burn marks.
The operator slows feed, changes RPM, and increases pass count — cycle time climbs and quality still isn’t stable.
A 5-minute cutter cleaner routine fixes it:
Resin softens and brushes off.
Flutes clear, edges shear properly again.
The original feeds/speeds suddenly work again.
That’s why pros treat cleaning as a diagnostic step: it restores a known baseline fast.
When cleaning isn’t enough: signs you need sharpening or replacement
Cutter cleaner restores performance when the edge is fine but coated. If you’re seeing these after cleaning, you’re likely dealing with wear or damage:
Persistent tear-out on every pass
Visible chipping along the cutting edge
Noticeably higher cutting noise and vibration
Heat discoloration that returns immediately
Tool wear is strongly tied to surface finish and quality in machining contexts; when wear progresses, cleaning can’t restore geometry.
Recommended frequency: how often should you use cutter cleaner?
For most woodworking and CNC routing:
After resinous woods (pine, fir, some hardwoods)
After sheet goods with glue/resins (plywood, MDF, melamine)
When you see burning, fuzzing, or unexplained roughness
As part of an end-of-shift wipe-down for tools used heavily
Many shop-friendly maintenance routines emphasize quick, frequent checks to protect repeatability and avoid “chasing settings.”
FAQ
What does cutter cleaner do?
Cutter cleaner dissolves pitch, resin, glue, and grime that coats cutting edges, restoring cleaner cutting action and reducing burning and roughness. When buildup is removed, the cutter shears more and rubs less, improving finish.
Can a dirty cutter really look dull?
Yes. A coated carbide edge can behave like a dull edge because resin changes the edge geometry and increases friction. This often shows up as burn marks and fuzzy edges.
How long should I soak a cutter in cleaner?
In most shop routines, a short soak or dwell time is enough — long enough to soften buildup so it brushes off easily. Follow your product label, then brush gently and dry immediately.
What brush should I use on carbide cutters?
Use brass or nylon. Brass is stiff enough for resin but less aggressive than steel. Avoid harsh scraping that can chip edges.
Is it safe to use acetone as a cutter cleaner?
Acetone can be effective for some residues, but it’s highly flammable and needs strong ventilation and careful handling. If your shop isn’t set up for volatile solvents, use a purpose-made cutter cleaner or safer degreaser.
Conclusion: cleaner cuts start with cutter cleaner
If you want cleaner edges, fewer burn marks, and more predictable results, the fastest upgrade you can make isn’t a new bit — it’s a cutter cleaner habit. Pros clean first because buildup mimics dullness, wastes time, and forces unnecessary setting changes. A quick spray/soak, gentle brush, and thorough dry brings cutters back to baseline — so your tools cut like they’re supposed to, your finish improves, and your process stays consistent.


Leave a comment