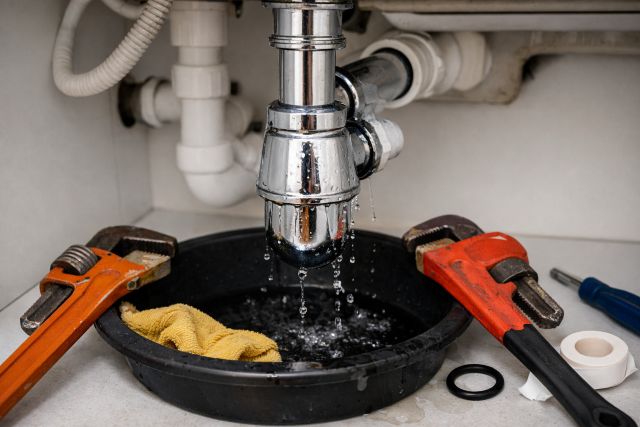
A leaking bottle trap can feel like a small annoyance — until it stains a vanity, swells a cabinet base, or leaves a persistent musty smell under the sink. The good news is that most bottle trap leaks come from a handful of predictable issues: a washer that’s out of place, a nut that’s slightly loose, a thread that’s cross-started, or a trap that’s cracked from over-tightening. In this guide, you’ll learn how to identify the exact leak point and apply quick, reliable fixes that actually last — without turning your bathroom into a DIY disaster.
Leaks matter more than people think. Household leaks can waste nearly 10,000 gallons of water per year on average, and 10% of homes have leaks wasting 90 gallons or more per day, according to the U.S. EPA. Even a “slow drip” under a sink is worth fixing promptly.
What is a bottle trap (and why it leaks differently)?
A bottle trap is a sink waste trap with a cylindrical “bottle” chamber that holds water to block sewer gases. It’s commonly used where space is tight or where aesthetics matter (like pedestal sinks and modern vanities). Because its joints often rely on compression nuts and tapered rubber washers, small alignment errors can create slow drips — especially after cleaning, bumping the pipework, or reassembling it.
If you’ve noticed slow drainage or odors too, that can point to debris buildup inside the bottle section — cleaning is often part of a complete fix.
Bottle trap leaking? Start by finding the exact leak point
Before you tighten anything, do a 2-minute diagnosis. A bottle trap typically leaks from one of four places:
Top inlet joint (from sink tailpiece into the trap)
Outlet joint (trap to wall pipe/waste arm)
Bottom cup / cleaning cap (where the bottle opens for cleaning)
Hairline crack in the trap body (often from overtightening or age)
Quick test (featured-snippet friendly)
Dry everything with tissue, run water for 20–30 seconds, then watch for the first bead of water. The first bead usually marks the true source; everything below may just be runoff.
Common causes of a bottle trap leak (and the fastest fixes)
1) Misplaced or reversed conical washer (most common)
Bottle trap connections often use a tapered rubber seal that must face the right direction to compress properly. If it’s flipped, it may seal “sort of” until pressure changes or the pipe shifts—then it drips.
Real-world clue: the leak appears only when water is running, and it may stop if you push the pipe slightly inward.
Fix:
Loosen the compression nut.
Slide the washer off and check orientation. Many tapered seals are designed so the thinner edge faces into the trap to seat correctly when tightened.
Reseat the pipe fully, then tighten hand-tight plus a small additional turn.
2) Loose slip nut (but not loose enough to notice)
A bottle trap can drip even when the nut feels “tight” because the washer isn’t fully compressed or the pipe isn’t seated squarely.
Fix:
Support the trap body with one hand.
Tighten the nut by hand until snug.
Add a small turn with pliers only if needed (especially on plastic—go gently).
3) Cross-threaded nut after cleaning or installation
Cross-threading happens when the nut starts at an angle. It can feel tight but won’t compress the washer evenly, leaving a micro-gap.
Fix:
Undo the nut completely.
Clean threads, then restart by turning counterclockwise until you feel the “drop” into the thread start.
Tighten slowly, keeping the pipe aligned.
4) Debris on the sealing surface
Even a grain of grit, old limescale, or a sliver of degraded rubber can prevent a watertight seal.
Fix:
Disassemble the leaking joint.
Wipe the mating surfaces.
Rinse the washer and groove, then reassemble.
5) Over-tightening (yes, that can cause leaks)
It’s intuitive to crank down harder when you see a drip — but over-tightening can deform washers, damage olives/ferrules, or even crack plastic fittings, making leaks worse.
Fix:
Back off and re-seat the washer.
Tighten only until the drip stops—then stop.
If a plastic nut has stress marks or the trap body shows whitening/crazing, replace the part.
6) Cracked bottle trap body or cap
A hairline crack can leak intermittently—often only when the trap is full or when the cabinet warms up.
Fix:
Replacement is the correct solution. Sealants are usually temporary and can fail without warning.
Step-by-step bottle trap leak fix (DIY method that works)
Step 1: Prep the area
Place a bowl under the trap and keep tissues handy. Turn off the faucet only; you usually don’t need to shut the water supply unless you’ll remove the sink waste itself.
Step 2: Identify the leaking joint
Run water and watch closely:
Drip from the nut area = washer/seat/alignment
Drip from the trap body = crack or cap seal issue
Step 3: Disassemble only the leaking section
Don’t take the whole assembly apart unless you need to. Less disassembly = fewer chances to misalign.
Step 4: Inspect washers and threads
Look for:
Flattened, split, or hardened rubber
Missing washers (surprisingly common after cleaning)
Cross-thread damage on nuts
Step 5: Reassemble with correct alignment
The pipe should insert straight and fully into the trap before tightening. If the pipe is slightly short, strained, or angled, the seal may never hold reliably — this is where extension pieces or a different trap configuration may be needed.
Step 6: Tighten correctly
Go hand-tight first. If it still weeps, add a small turn. If tightening increases leaking, stop and re-seat — don’t keep cranking.
\When to use plumber’s tape (and when not to)
People often reach for PTFE (Teflon) tape automatically. For compression slip joints (common on bottle traps), the seal is usually made by the washer, not by the threads. Tape on threads may sometimes help a slightly worn connection, but it can also mask the real issue (misalignment, bad washer).
A better approach:
Fix the washer and alignment first.
Replace worn washers if needed.
Use tape only if the manufacturer specifies it or you’re dealing with a threaded (not compression) joint.
Quick “what’s leaking?” scenarios
Scenario A: Leak starts right after you cleaned the trap
Most likely: washer flipped, washer not seated, or nut cross-threaded. This is extremely common after removing the bottle section for cleaning. Cleaning bottle traps is straightforward, but reassembly accuracy matters.
Scenario B: It leaks only when the sink drains fast (full basin release)
Most likely: momentary pressure + slight misalignment at inlet joint. Re-seat tailpiece and washer; ensure the trap isn’t being pulled sideways by the outlet pipe.
Scenario C: It leaks slowly all the time, even with no water running
Most likely: water trapped inside is seeping from the bottom cap seal or a hairline crack. Inspect the cleaning cap O-ring/gasket and the trap body.
Preventing bottle trap leaks long-term
A bottle trap that’s correctly installed shouldn’t need constant attention. These habits help it stay dry:
Avoid using the trap as a “handle” when storing items under the sink (knocks cause misalignment).
Don’t over-tighten after maintenance — over-tightening is a known cause of damage and leaks.
If you use harsh drain chemicals frequently, expect rubber parts to age faster (washers may harden and lose sealing ability over time).
Clean the bottle section periodically if you get slow drainage or odors; buildup can contribute to poor performance and repeated tampering (which increases leak risk).
And remember: small leaks add up. The EPA’s estimate of nearly 10,000 gallons per household per year wasted from leaks puts even minor drips into perspective.
FAQ
Why is my bottle trap leaking from the nut?
Most bottle trap nut leaks come from a mis-seated or reversed conical washer, slight misalignment, or cross-threading. The fix is usually to loosen the nut, re-seat the washer and pipe straight, then tighten hand-tight until the drip stops.
Can I fix a bottle trap leak without replacing the trap?
Yes—if the leak is from a joint (nut/washer) or the bottom cap seal, you can usually fix it by reseating or replacing washers and tightening correctly. If the trap body is cracked, replacement is the proper solution.
Should I use silicone or sealant on a leaking bottle trap?
It’s not recommended as a primary fix. Bottle trap joints are designed to seal with washers and correct alignment. Sealant can hide the real problem and may fail later, especially if the trap is opened for cleaning.
What causes bottle traps to leak after cleaning?
After cleaning, leaks usually happen because a washer was installed in the wrong orientation, left out, pinched, or the nut was cross-threaded on reassembly. Correct washer seating and straight pipe alignment typically solves it.
How tight should bottle trap nuts be?
Snug by hand, then only a small additional turn if needed. Over-tightening can deform sealing parts or damage fittings and lead to leaks.
Conclusion: stop the drip with the right bottle trap fix
A leaking bottle trap is usually a simple seal-and-alignment problem—not a mystery. If you pinpoint the first leak bead, check washer orientation, re-seat the pipe straight, and tighten gently (not aggressively), you’ll solve most drips in under an hour. And if you spot a crack or repeated leaking after proper reseating, replacing the trap is the smarter, longer-lasting repair.
If you want, paste the first 2–3 sentences of your site’s “Plumbing Services” page and I’ll tailor the internal links and calls-to-action so this article fits your exact website structure and tone.


Leave a comment