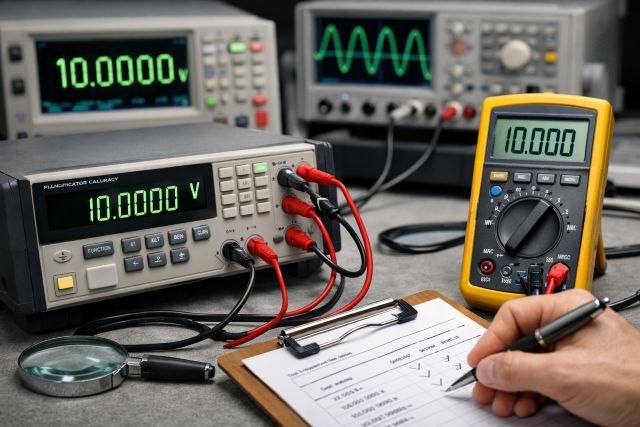
A calibrator that’s slightly off can quietly distort every measurement you trust it to validate. That can mean unnecessary rework, product failures, audit findings, or weeks spent chasing drift that “shouldn’t be there.” Calibrator accuracy isn’t just a number from a datasheet; it’s the combination of traceability, uncertainty, environment, technique, and decision rules that determine how reliable your results really are.
This article shows how to test calibrator performance in a practical way, how to verify results with uncertainty-aware logic, and how to improve outcomes without automatically replacing equipment.
What calibrator accuracy actually means in real-world metrology
People often use “accuracy” as a simple concept: how close the calibrator output is to the true value. In metrology, you’ll make better decisions if you treat accuracy as something you demonstrate with evidence, not something you assume.
A strong accuracy claim typically rests on metrological traceability, measurement uncertainty, and a clear pass/fail decision rule.
Metrological traceability is commonly defined as the property of a measurement result that can be related to a reference through a documented unbroken chain of calibrations, with each step contributing to measurement uncertainty. NIST explicitly uses this framing in its traceability policy and related guidance.
Measurement uncertainty is the quantified doubt around a result. If you want calibrator accuracy that’s defendable in audits and useful for risk control, uncertainty needs to be part of the conversation, not an afterthought. NIST’s SOP guidance on uncertainty emphasizes having data from measurement control programs and understanding the technical basis of the measurement when building a complete uncertainty evaluation.
Decision rules determine how you interpret results near limits. The same measurement data can lead to different pass/fail outcomes depending on whether you account for uncertainty and how you manage false accept versus false reject risk.
Accuracy vs precision vs stability vs uncertainty
A calibrator can “look accurate” in a quick check and still be untrustworthy in daily use if it’s unstable or inconsistent. These distinctions help you diagnose what’s actually wrong.
Accuracy is closeness to a reference value. Precision is how tightly repeated readings cluster under the same conditions. Stability and drift describe how the output moves over time. Uncertainty is the quantified range around the result when you account for relevant influences.
In practice, many frustrating calibration issues are not accuracy failures. They are repeatability problems caused by connections, thermal effects, noise pickup, or inconsistent warm-up, which then show up as “accuracy issues” because the final number doesn’t match expectations.
The foundation: traceability and defensible certificates
Before you test a calibrator, you need confidence in the reference you’ll compare it against. Traceability is only meaningful if the chain is documented and the uncertainty is known. NIST’s traceability guidance emphasizes the unbroken chain concept and uncertainty at each step.
When you review a calibration certificate for a reference standard, look for stated uncertainties, identified standards used, and conditions or method notes that affect the result. If you can’t see uncertainty, it becomes harder to justify acceptance decisions, especially near tolerance edges.
This also matters for internal quality systems. Even if you’re not running an ISO/IEC 17025-accredited lab, customers and auditors increasingly expect your calibration program to show that results are traceable and that uncertainties were considered.
How to test a calibrator: a practical verification workflow
Testing calibrator accuracy is best approached as a controlled comparison, not a one-time spot check. The goal is to prove performance for the ranges and points you actually use, using a method that can be repeated and defended.
Step 1: choose the right reference standard and confirm its uncertainty
Your reference should be meaningfully better than the calibrator under test, and it should have current calibration evidence with stated uncertainty. NIST’s uncertainty guidance highlights the need for statistical data and technical basis for completeness in uncertainty evaluation, which starts with knowing what your standard contributes.
If your reference is too close in performance to the calibrator, you can end up with “indeterminate” outcomes where you can’t confidently identify which device is responsible for the deviation.
Step 2: control the environment and warm-up conditions
Environmental influences are not theoretical. Temperature gradients, airflow, humidity, EMI/RFI, and even how cables are routed can move results. A calibrator that is in spec can appear out of spec if you ignore stabilization time, handle connectors mid-test, or run sensitive measurements near noise sources.
Treat warm-up time as part of the test method. Make it consistent, document it, and enforce it.
Step 3: select test points that match real usage
A calibrator can perform well at mid-scale but be off at low or high ends of a range. Your test points should reflect your risk and your workload.
It’s common to verify low, mid, and high points for each range used in production or service work. It’s also smart to include the points that appear in customer specs or regulatory procedures, because those points often drive audits and disputes.
Step 4: check repeatability, not just a single reading
Repeatability is the fastest way to detect setup issues. If the same point gives different answers each time, your limiting factor may be connections, thermal settling, noise, or operator technique rather than calibrator specification.
A repeatability check is simple: re-run the same point multiple times using the same setup, then look at the spread. If the spread is large relative to the tolerance you care about, the method needs work before you judge the calibrator.
Step 5: evaluate pass/fail using uncertainty-aware decision rules
Without uncertainty, pass/fail decisions become overly optimistic. If you accept a unit just because the observed error is inside tolerance, you might still accept an out-of-tolerance device due to measurement uncertainty, especially near the limits.
This is where guard banding comes in. Guard banding tightens the acceptance criteria to reduce the probability of false accept. The best guard band approach depends on your risk tolerance, customer requirements, and how you estimate uncertainty, but the concept is widely used in calibration interval and decision-rule practice.
TUR and why it determines how trustworthy your verification is
TUR, or Test Uncertainty Ratio, compares the tolerance you must verify against the uncertainty of your test method. Higher TUR means you can separate in-tolerance from out-of-tolerance conditions with more confidence.
A widely used rule-of-thumb in industry has been the 4:1 concept, often interpreted as keeping measurement uncertainty within about a quarter of the tolerance. The exact targets and practices can vary by industry and quality system, but the point is consistent: low TUR means higher risk and less decisive results.
If your TUR is poor, repeating the same test won’t fix it. Instead, you improve by using a better reference, reducing method uncertainty, narrowing the scope to what you truly need, or sending the work to a lab with stronger capabilities.
A realistic example: when the calibrator seems “fine” but your results aren’t
Imagine you’re verifying a process instrument with a tolerance of ±0.50 units. Your comparison method has an expanded uncertainty of ±0.20 units. Your observed error comes out to 0.48 units, which looks like a pass if you ignore uncertainty.
But with uncertainty, the true error could plausibly be above 0.50 units. In that case, “pass” becomes a risky decision that can lead to false accepts. This is why uncertainty-aware decision rules and guard banding matter most near the limits.
In practice, this scenario often shows up as inconsistent audit outcomes. One lab passes, another fails, and nobody trusts the instrument. The root cause is frequently not the device. It’s that decision rules and uncertainty were never standardized.
How to improve calibrator accuracy results without replacing equipment
Most improvement comes from eliminating controllable sources of uncertainty and inconsistency. This is usually faster and cheaper than upgrading standards.
Improve cabling and connections first
Worn leads, oxidized connectors, and inconsistent torque are common sources of error. Small contact resistance changes can dominate low-level measurements. Cable routing can also introduce noise pickup.
If your verification results drift when you touch or move a cable, that’s not a calibrator failure. That’s a setup that needs standardization and better hardware control.
Standardize warm-up and handling
Warm-up time must be consistent and appropriate for the calibrator and the measurement range. Handling matters too. Heat from hands can change sensitive resistance measurements, and mechanical movement can change contact quality.
Build warm-up and handling steps into the procedure, not just tribal knowledge.
Reduce environmental variability
If you run verification tests at different times of day, near different equipment, or under different HVAC loads, you can create drift that looks like calibrator instability.
Try to verify in a controlled zone, at stable temperature, with predictable airflow and minimal noise sources. If your environment is variable, your uncertainty should reflect it.
Use measurement assurance thinking
NIST’s uncertainty guidance stresses the value of data and measurement control programs for understanding the measurement process. That concept is extremely practical: track your own results over time, watch for shifts, and use trends to catch drift early.
When you add process control to calibration, accuracy becomes something you monitor, not something you hope for.
Calibration intervals: how to verify and improve long-term accuracy
Even a great calibrator drifts. The question is not whether drift exists; it’s how you manage it.
NIST’s Good Measurement Practice guidance on assigning and adjusting calibration intervals emphasizes prerequisites like calibration history, valid certificates, and sufficiently small uncertainties for lab standards, and it supports adjusting intervals as data is collected and evaluated.
NCSLI also summarizes interval analysis approaches that compare observed in-tolerance percentages against reliability targets, then evaluate computed intervals and engineering overrides separately.
A practical interval strategy looks like this: start with a conservative interval, collect performance history, then adjust based on actual drift and out-of-tolerance findings. If the calibrator is consistently stable, you may extend intervals. If you see borderline failures or drift trends, shorten them.
Common user questions about calibrator accuracy
What is calibrator accuracy?
Calibrator accuracy is how closely the calibrator output matches a reference value under defined conditions, supported by metrological traceability and quantified measurement uncertainty so results can be compared and defended.
How do I test calibrator accuracy in-house?
You test calibrator accuracy by comparing it at selected points across the ranges you actually use against a higher-accuracy traceable reference, repeating points for repeatability and stability, and evaluating results using uncertainty-aware decision rules.
What does “traceable to NIST” mean?
NIST describes metrological traceability as relating a measurement result to a reference through a documented unbroken chain of calibrations, with each step contributing to measurement uncertainty. A meaningful traceability claim includes that documentation and uncertainty evidence, not just a label.
How can I improve my calibration results without buying a new calibrator?
Most improvements come from reducing method and environment uncertainty: better cables and connectors, standardized warm-up and handling, stable environmental conditions, and uncertainty-based decision rules. Over time, use your calibration history to adjust calibration intervals appropriately.
Conclusion: how to make your calibrator accuracy defensible and repeatable
Calibrator accuracy improves when you treat it as a system, not a single spec. Use traceable references with stated uncertainty, standardize your method and environment, and evaluate results using uncertainty-aware decision rules that manage risk near limits. Then use calibration history to adjust intervals so drift is caught before it impacts production or compliance. With those pieces working together, your calibrator becomes a reliable foundation for every measurement decision, not a question mark you only notice during audits.


Leave a comment